Speak to the World! How to Build a Multilingual Site with WordPress
If your website only speaks one language, you’re probably leaving a lot of potential visitors and customers out in the cold. That’s when having a WordPress multilingual website makes all the difference.
The internet may seem like English dominates it, but there are more than 7,000 languages spoken worldwide, and studies have shown that people are far more likely to trust a brand and complete a purchase if the content is in their native language.
In other words, going multilingual helps you grow your audience, build trust, and boost sales. Plus, every new language you add opens the door to ranking in new search results, which means more traffic coming your way from different parts of the globe.
What Will You Need?
Although there are many WordPress translation plugins available, we’re using TranslatePress for this tutorial. Here’s why:
- It’s straightforward and visually appealing. You can see exactly what your visitors will see when you translate your website from the front end.
- It is compatible with pretty much everything. You name it: WooCommerce, SEO plugins, popups, images, links, etc.
- It is optimized for search engines. Everything that search engines are interested in, including URLs and meta descriptions, can be translated.
- It doesn’t slow down your website. Nothing is slowed down since all translations are stored locally, on your site, so there’s no need to fetch them with each load.
Basically, it’s powerful enough for advanced users but still beginner-friendly.
It offers a freemium pricing structure, which means a free version is available for download on WordPress.org. This includes the basic functionalities for adding one additional language, and you can use it for most of this tutorial.

The premium version does come with a lot more features, such as SEO translations, unlimited languages, and the ability to automatically detect a user’s preferred language.
☂️
Tip
If you’re using WP Umbrella to monitor your WordPress site, all your translated pages will appear in the same dashboard, providing a smoother setup and real-time performance alerts.
Step-by-Step Tutorial On How To Make A WordPress Multilingual Site with TranslatePress
Step 1. Installing and Configuring TranslatePress
Installing the plugin is easy and intuitive. All you have to do is follow three simple steps:
- In your WordPress dashboard, go to Plugins → Add New.
- Search for TranslatePress, then install and activate it.
- After that, go to Settings → TranslatePress:
- Choose your default language.
- Add your target languages.
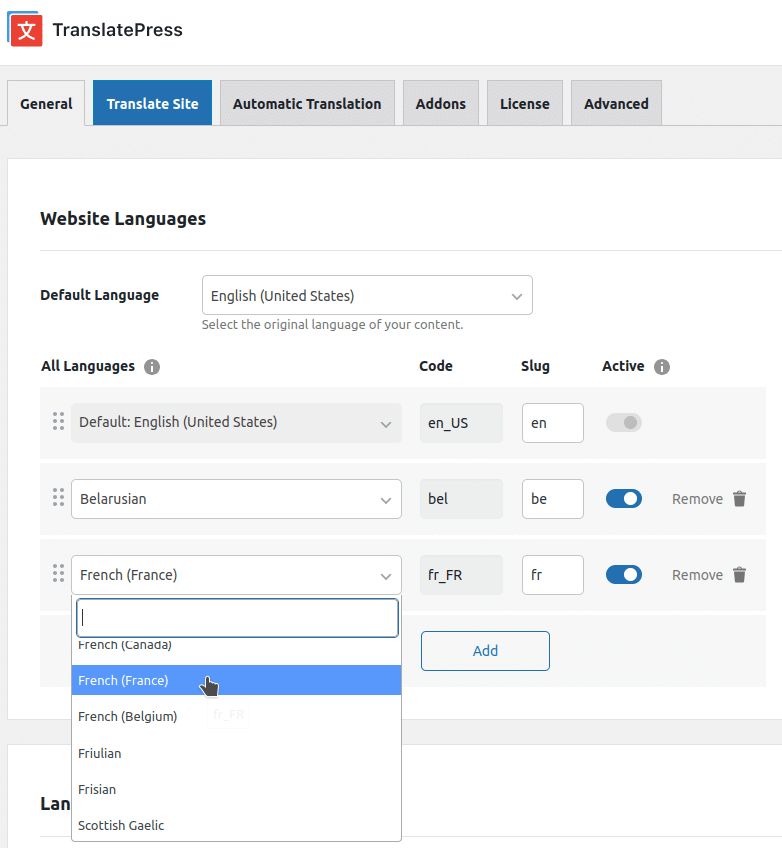
💡 Premium tip: You can add as many languages as you want with TranslatePress Premium (you can only add one extra language with the free version). Additionally, you can turn on automatic language detection to ensure that users are immediately directed to the appropriate version of your WordPress multilingual site.
Step 2. Automatic Translation with TranslatePress AI
Now that the plugin is ready, it’s time to translate your content. With TranslatePress AI, all your content will be automatically translated in just a few clicks.
This is one of the best AI translation tools as it sources all top automatic translation engine services and chooses the most suited one for each language pair and use case to ensure the best accuracy possible for automatic translation standards.
To enable it, all you have to do is:
- Go to Settings → TranslatePress → Automatic Translation.
- Enable automatic translation and make sure TranslatePress AI is selected as your translation engine.
- Make sure you have an active TranslatePress license (free or premium).
- Hit the Save button at the bottom of the page.
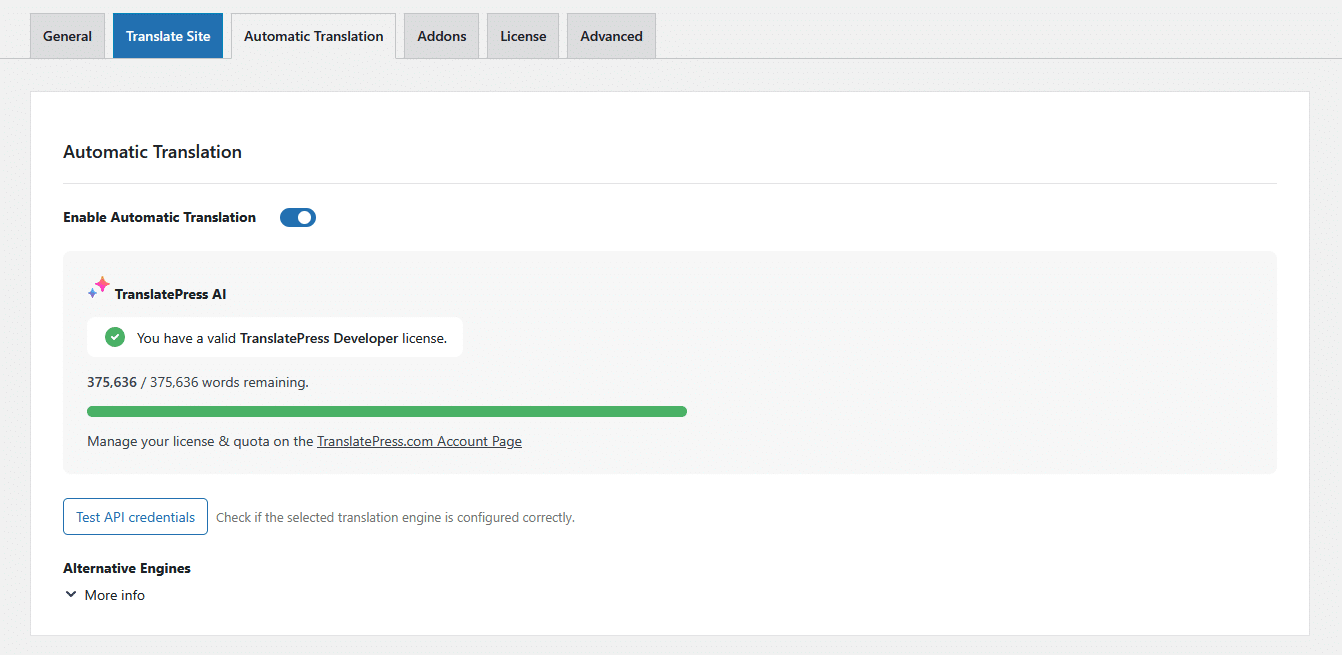
Once enabled, your entire site (menus, pages, forms, popups, etc.) will be automatically translated in just a few seconds.
As you may have already noticed, when you activate your license, you already have a set number of AI words available for translation. With the free version of the plugin, you get 2,000 AI words for your website, and with a paid license, that number can go up to 500,000. Now, that should be enough for most websites, but if you ever need more, you can always buy them directly from your TranslatePress account.
However, if you’d rather skip automatic translation entirely, you can move on to Step 3 and manually translate everything from scratch. You can also edit the automatic translations in the next step if you feel the need for it.
Step 3. Manual Translation or Fine-Tuning AI Translations
You can manually edit or add translations, whether you use TranslatePress AI or not.
All you have to do is visit any page on your site and click “Translate Page” in the admin bar. Then, the visual editor will open. Hover over any element you want to edit, click the pencil icon, type your translation in the dedicated box, and hit Save.

This method gives you complete control over the translations you choose, which is perfect if you want to enhance AI’s output or translate in a particular way.
Step 4. Translating SEO and Hidden Content
Translating only the text that is visible on your website is not enough; you also need to focus on the SEO content.
For this, the premium TranslatePress licenses come with the SEO Pack add-on. With this add-on, you can translate meta titles, descriptions, and even URL slugs directly in the visual editor to create optimized translations for each language.
So, once you have an active premium license, you can go to Settings → TranslatePress in your WordPress dashboard, and then navigate to the Addons tab to activate the SEO Pack Add-on.
To translate the SEO elements of your site, make sure to first set them up in the original language using an SEO plugin. Then, open the visual editor and simply select them from the string list under Meta Information, enter their translation, and click Save.
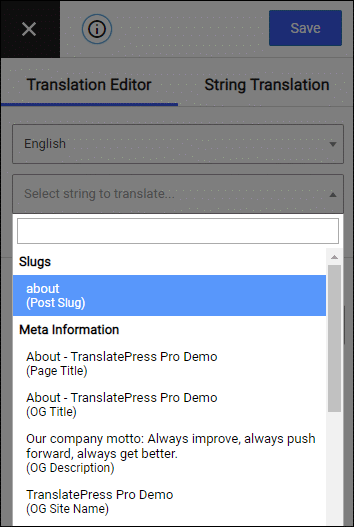
Extra tip: The URL slugs can be translated more in-depth from the String Translation tab.
Here’s how:
- Open your website in the TranslatePress visual editor.
- Switch to the String List tab.
- Find the title, description, or slug and translate them just like you would normal content.
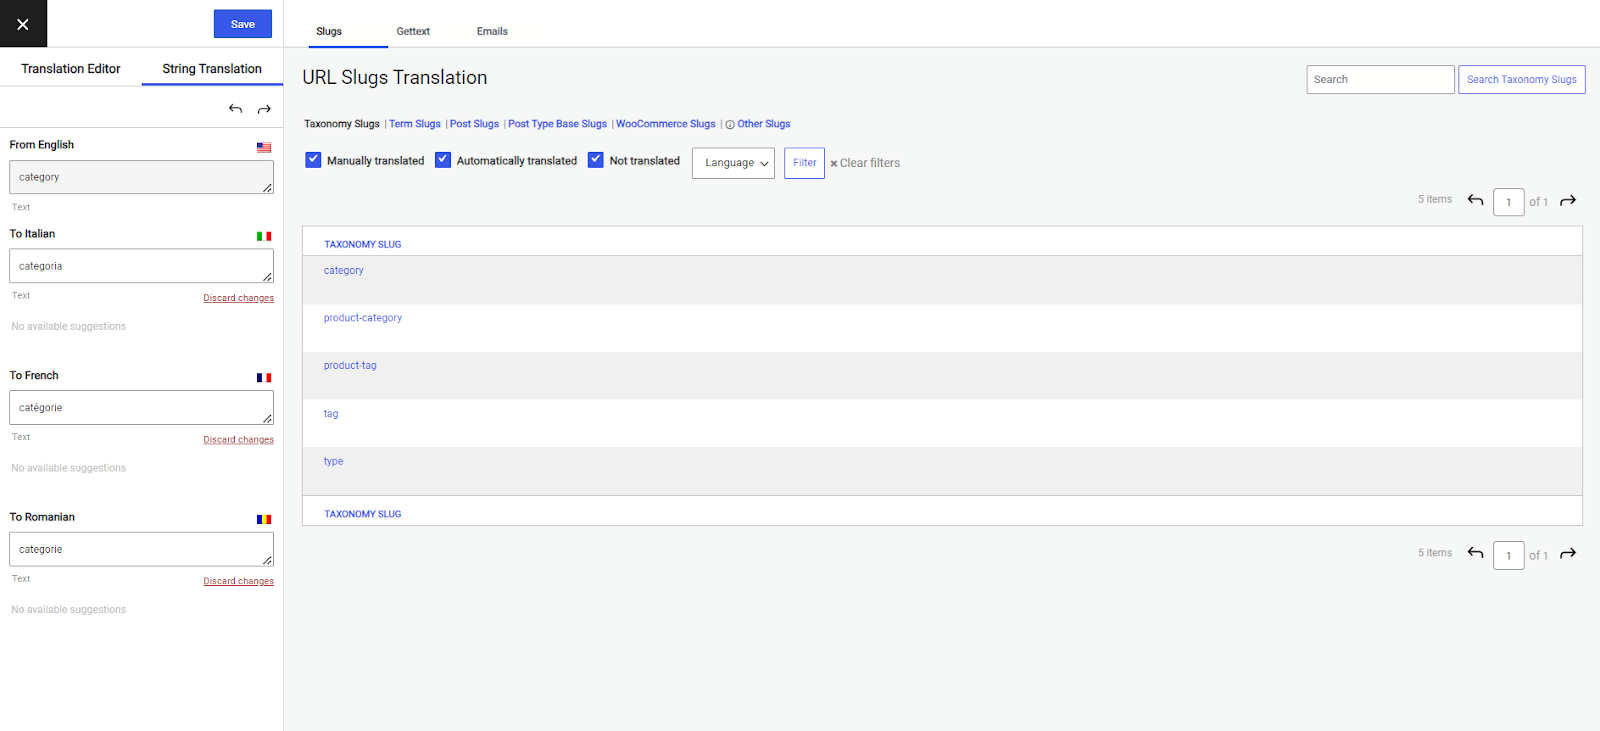
The SEO Pack is only available with a paid plan of TranslatePress; it guarantees that search engines properly index all of your website’s content, regardless of language, significantly improving your multilingual SEO. In other words, it makes your site discoverable in your secondary languages too, helping bring traffic from international searches.
The SEO Pack add-on also creates distinct XML sitemaps for every language automatically, so you don’t have to lift a finger.
Step 5. Translating Pop-ups, Menus, and Links
Pop-ups and other dynamic content can also be manually translated without additional steps. To add your translations, activate the pop-up on your website, click “Translate Page” as you would when translating any item, and input the appropriate translation. Once you are ready, hit Save.
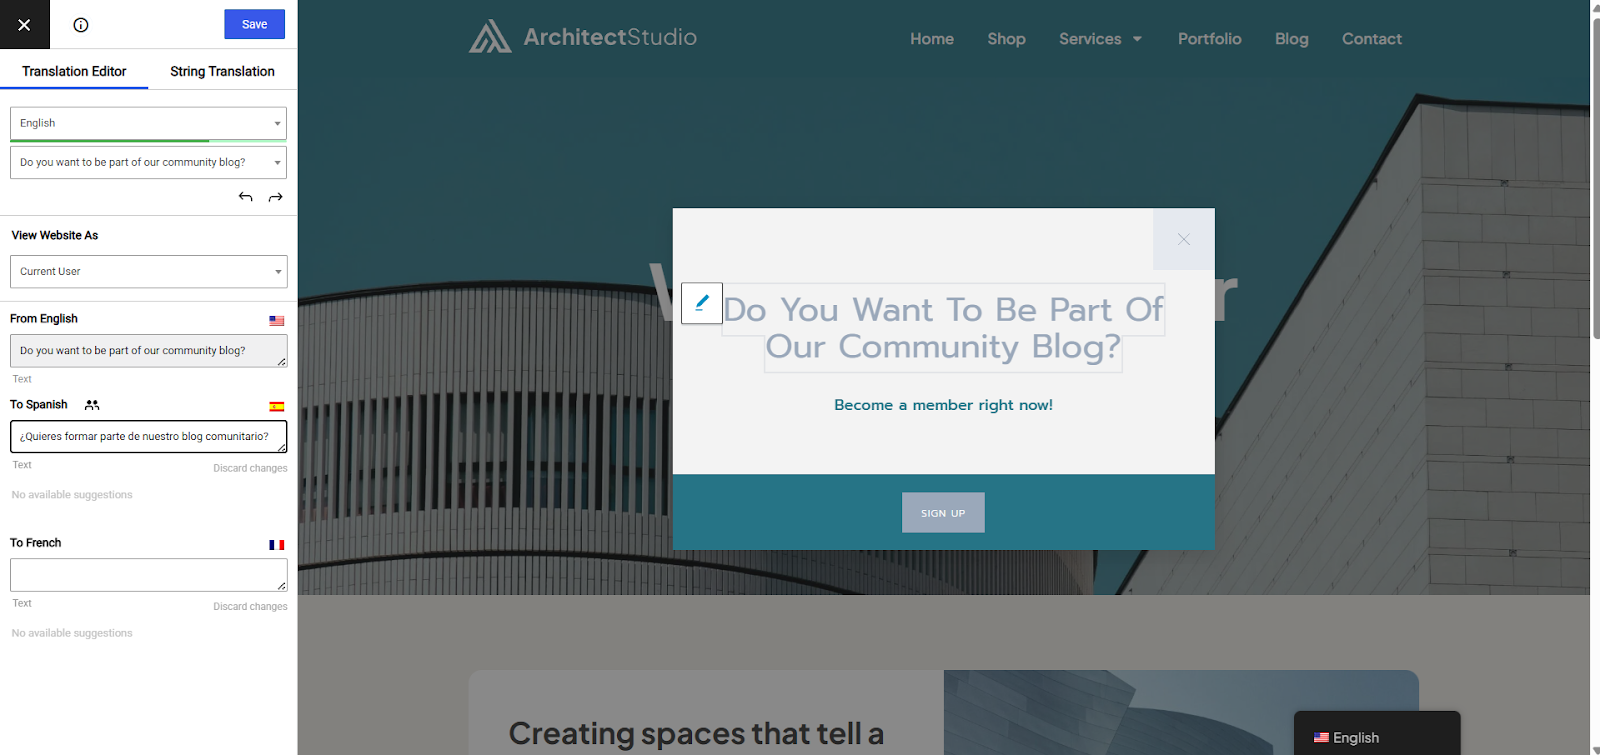
The same process applies to menus, buttons, and links, without the need for extra steps.
Additionally, to maintain a consistent user experience across languages, you can modify internal links to direct users to the translated version of the destination page.
Step 6. Reviewing and Going Live
Make sure everything is displaying correctly and reads naturally by looking through your website in each language before launching. Because of the integrated visual editor, this process is fast and intuitive, giving you the possibility to preview everything before publishing.
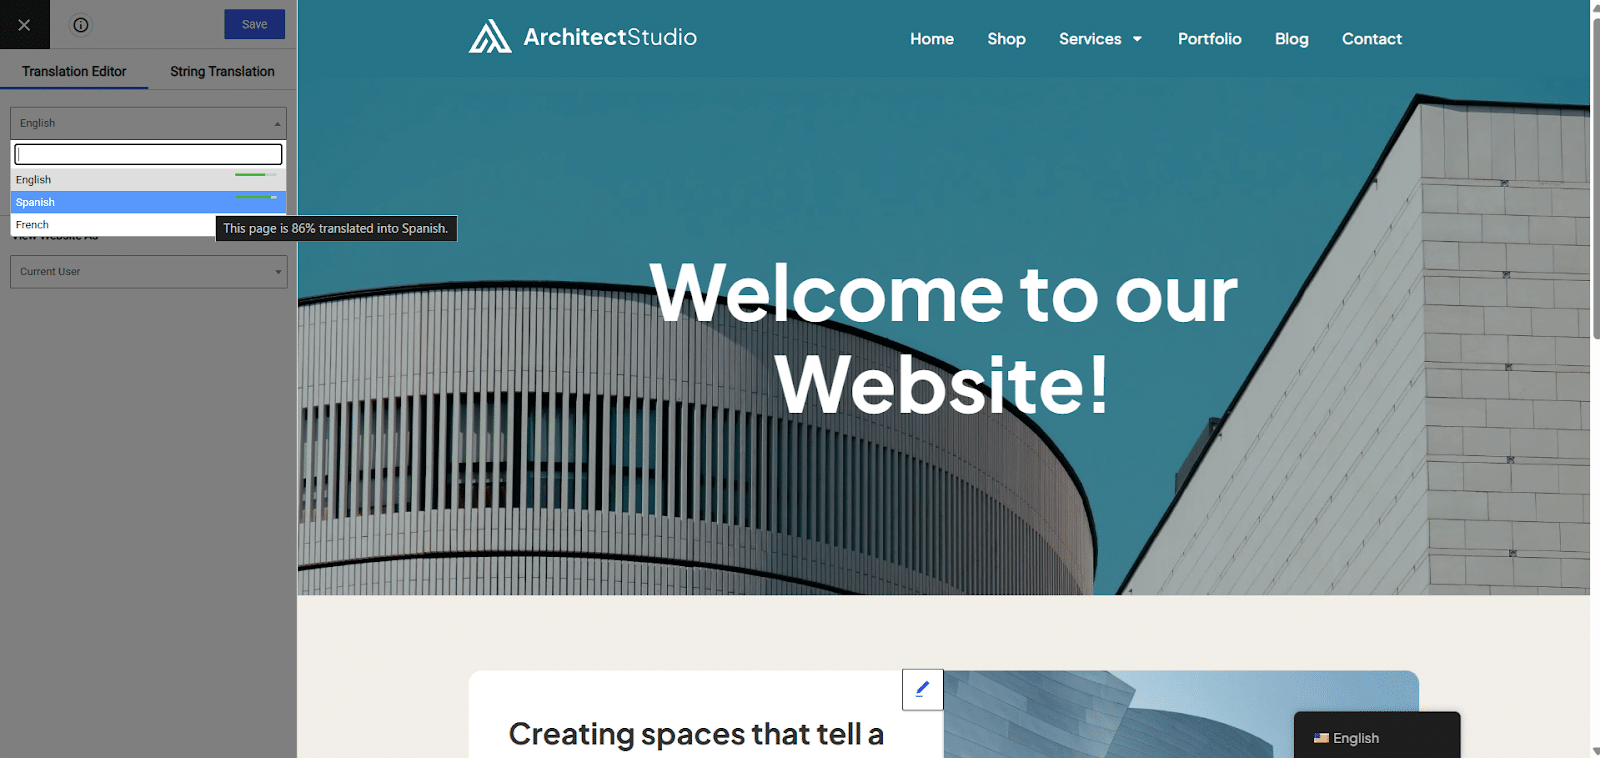
Once everything looks great, make sure to publish your changes. You are now ready to attract visitors from all over the world!
Bonus Tip ➕ WooCommerce Translation Made Simple
TranslatePress also easily integrates with WooCommerce if your website is an online store. Product names, descriptions, variations, and attributes can all be directly translated by opening any product page in the visual editor.
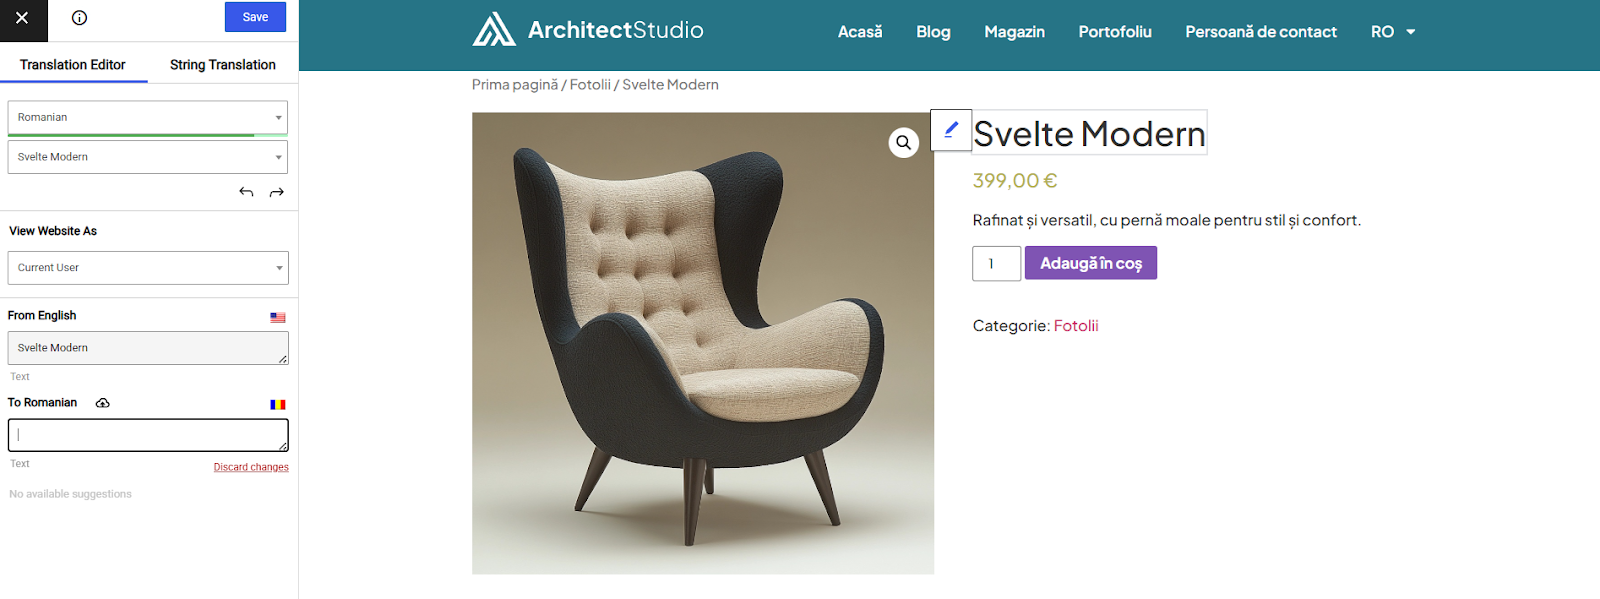
In order to provide customers with a completely localized experience from browsing to purchase confirmation, TranslatePress enables you to translate WooCommerce category pages, cart and checkout pages, and even transactional emails in the same way I already showed you.
Also read: Top 18 Essential WooCommerce Plugins
Final Thoughts
Although building a WordPress multilingual site may seem like an overwhelming task, it’s actually quite simple. Ultimately, language shouldn’t be a barrier to expanding your reach, but a tool to use in attracting new visitors. So, providing your content in their native language builds connection and trust, which is what they care about most.
The world is waiting. Are you ready to speak to it?
This is a guest post by Carmen Carstoiu from TranslatePress.
