How to Fix Folder and File Permissions in WordPress
Step-by-step guide to help you fixing the folder and file permissions issue in WordPress.

File and folder permissions in WordPress play a crucial role in site security and functionality.
Incorrect permissions can create security vulnerabilities, errors, and restricted access to files, impacting both user experience and site management, which is why understanding permissions is a key aspect of troubleshooting various WordPress issues.
This guide explains how to set the correct permissions, troubleshoot common issues, and follow best practices to keep your WordPress site secure.

Recommended Permission Settings for WordPress
| File/Folder | Recommended Permissions |
| wp-content | 755 |
| wp-admin | 755 |
| wp-include | 755 |
| wp-config.php | 600 |
| All other files | 644 |
Understanding WordPress Folder and File Permissions
In WordPress, folder and file permissions define who can read, write, or execute files and directories. These permissions are represented by a set of numbers (such as 755 or 644), each corresponding to a level of access for different users: owners, groups, and the public.
In a nutshell, permissions determine who can read, modify, or execute specific actions, essentially serving as the gatekeepers to your website’s core functionalities.
When configured properly, these permissions ensure that only authorized individuals or processes can make changes, thereby enhancing the site’s security.
Permission Levels Explained
File and folder permissions dictate who can read, write, modify, and access files on your computer’s file system. This is especially relevant for WordPress, which may need specific permissions to function correctly. The wrong settings can result in error messages such as the ‘Failed to Open Stream: No Such File or Directory’ or the ‘Installation Failed: Could Not Create Directory‘ and even security vulnerabilities.
Let’s breakdown users and permissions.
Types of Users: Individual, Group, and Public
Three types of users can be found: User, Group, and World.
- World: Anyone who’s on the internet.
- Group: A group of people with roles such as contributors or subscribers, etc.
- User – WordPress administrator
Permission Actions: Reading, Writing, and Executing
Each type of user can be granted different levels of access:
- Read – They can only view the file’s contents
- Write – They can modify the content of the file
- Execute – They can run codes in the file.
It’s vital to assign these actions carefully. For instance, giving a non-admin user write access to crucial files like wp-config.php can pose a security risk.
Thus, you would simply provide ‘Read the file’ access to Your editors. Nothing else.
Decoding the Numeric Representation of Permissions
The file permissions are summed up into three numbers
- First Number – Permissions that are offered to the user.
- Second Number – Access is provided to the group.
- Third Number – Authorizations that are offered to the world.
Each number represents a specific level of authorization as follows:
- 0 is for no access at all.
- 1 is for executing.
- 2 is for writing.
- 3 is for writing and executing.
- 4 is for reading.
- 5 is for reading and executing.
- 6 is for reading and writing.
- 7 is for reading, writing, and executing.
For example, a 644 permission means that the owner can read and write (6), but the group and the public can only read (4).
How to Check and Adjust Folder and File Permissions in WordPress
The first thing to do when you try to fix an Error in WordPress is always to back up your website! Then, you will have to update your directories’ permission settings, and your files’ permissions.
Secure your WordPress websites with automated backup, safe update and security monitoring with WP Umbrella
Install WP Umbrella on your websites in a minute and discover a new way to manage multiple WordPress sites.
Get Started for free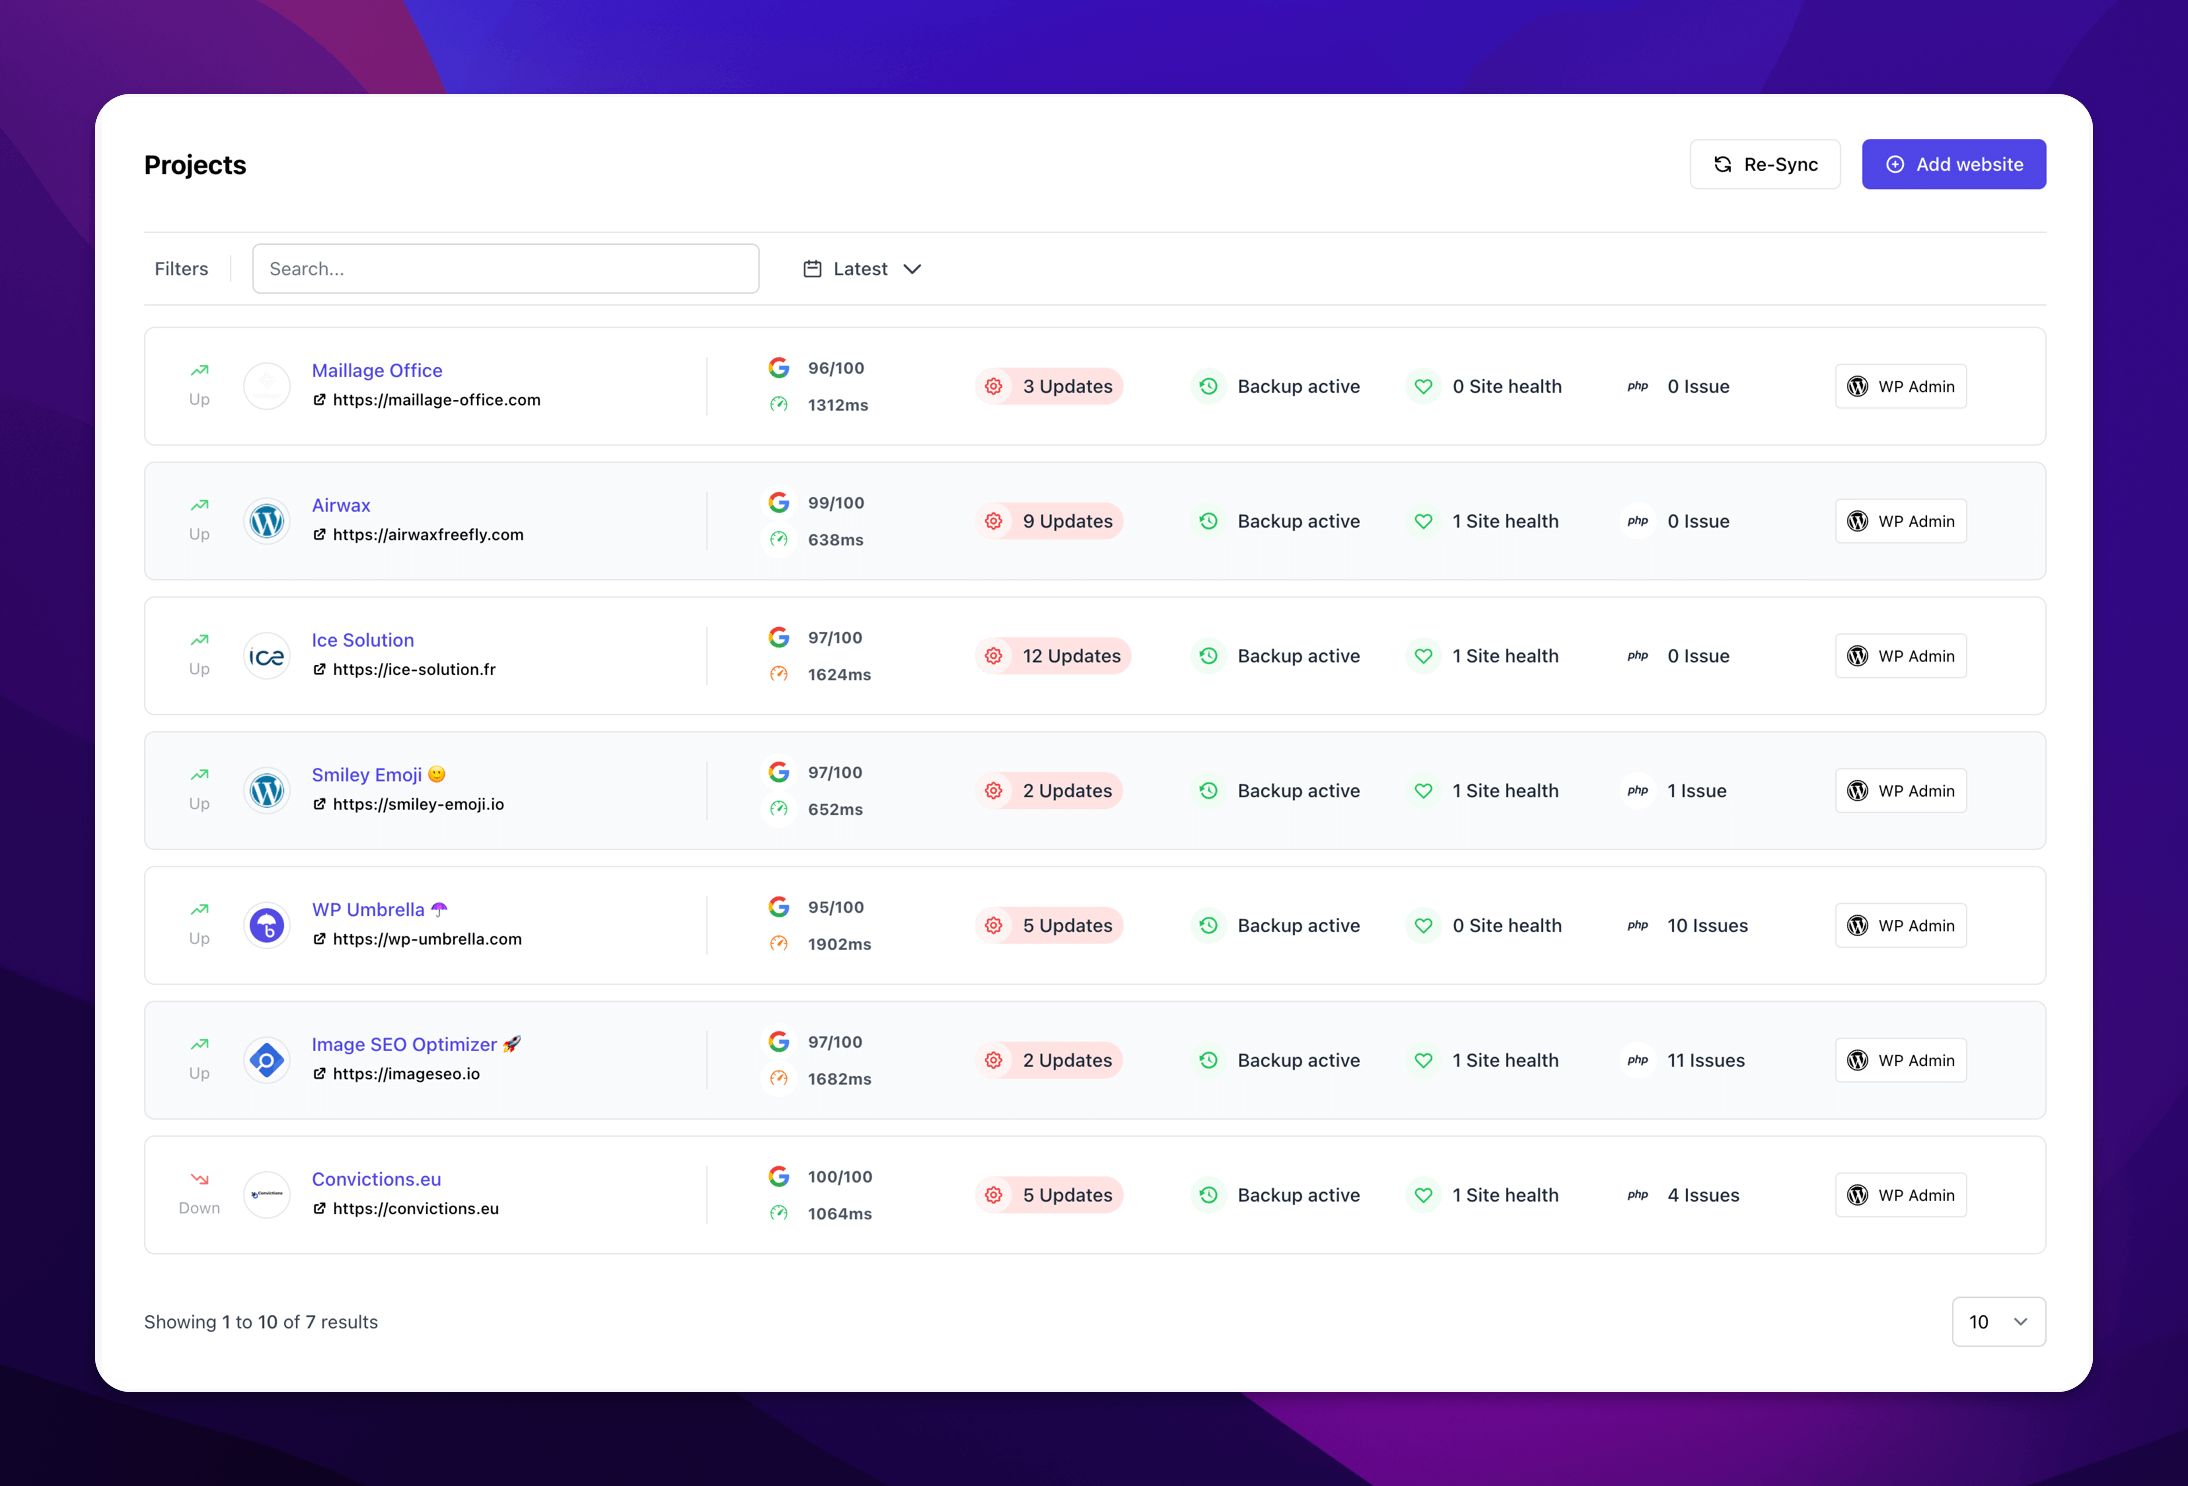
Step 1: Update Directory Permissions
First, find the WordPress root folder, which is normally named public_html or www, or after your site’s title.
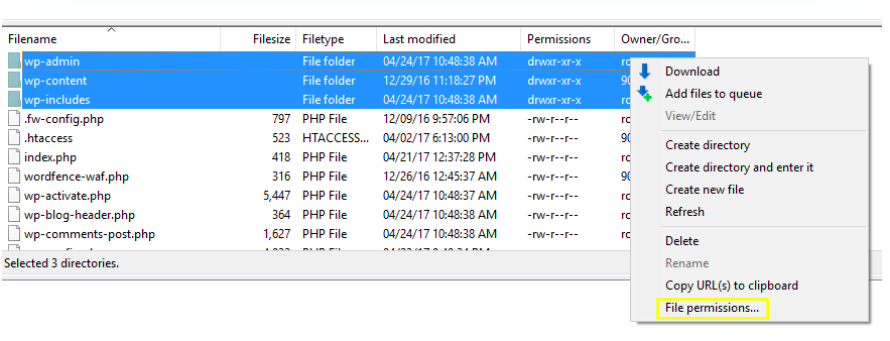
Inside you’ll find three folders (wp-admin, wp-content, and wp-includes), plus some other loose files.
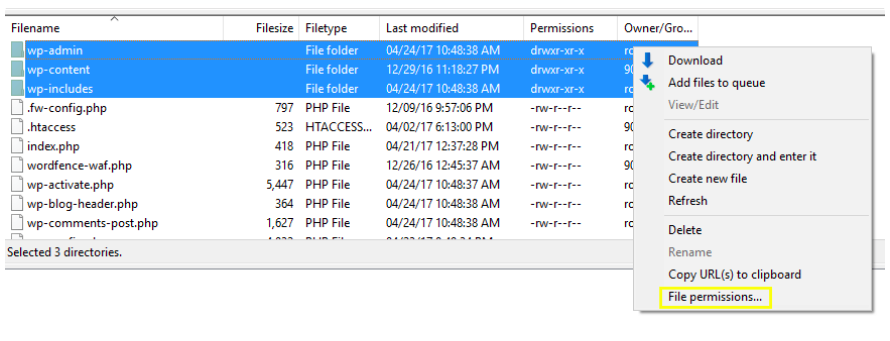
Pick up those three folders by right clicking on them and choosing Set Permissions.
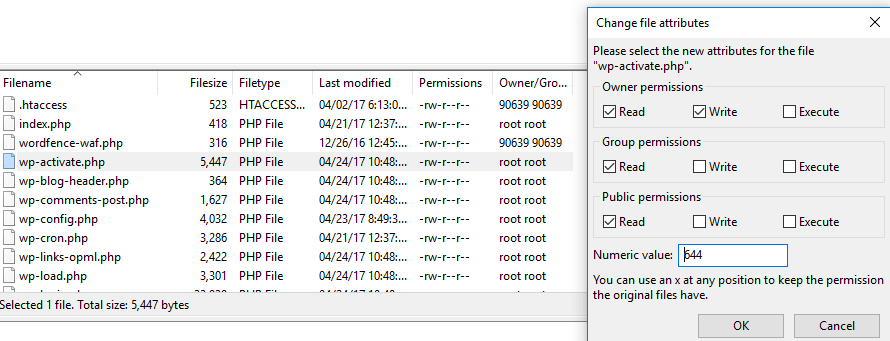
The Change file attributes screen should appear, which contains the Read, Write, and Execute permissions for the owner, the owner’s group, and the regular user.
- The first number represents your permissions;
- The second number represents your group;
- the third is your user’s permission level.
A user’s access level can be up to seven, which allows them Read, Write and Execute rights.
Set up the 755 permission in WordPress
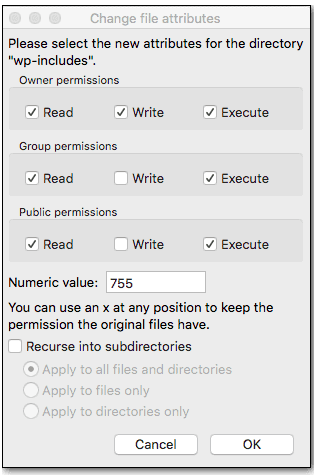
For the three folders above mentioned (wp-admin, wp-content, and wp-includes) we need to set the value 755 and check the option that says Apply only to directories.
The result is that WordPress gets full access, your users have access as well (but can’t delete anything), and your files remain unaffected, which leads us to the second step.
Step 2: Update File Permissions
We’ve just changed permissions levels on all of your directories. Now we’ll do the same thing for our files.
Return to the root of your site and select every file and folder within, including those we used earlier in this process. Use the right-click menu to set permissions again.
What you are doing this time is replacing the existing number in the Numeric value field with 644.
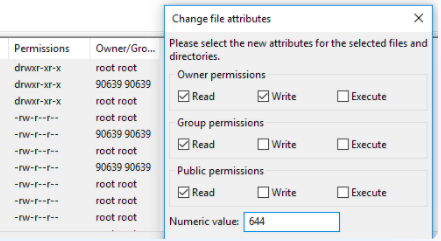
Since you own the files, you have the ability to read and modify each file. Your visitors and your group, however, may only read them.
Alternative Method: Using the Command Line
If you have SSH access to your server, you can set permissions with the following commands:
# Set permissions for folders
find /path/to/wordpress/ -type d -exec chmod 755 {} \;

# Set permissions for files
find /path/to/wordpress/ -type f -exec chmod 644 {} \;
Make sure to replace /path/to/wordpress/ with the actual path to your WordPress installation.
Prioritizing Security Through File and Folder Permissions
The devil is in the details. One overlooked permission can serve as a vulnerable point for attackers to exploit. That’s why setting your WordPress permissions wisely is not just good practice, it’s mandatory.
Lax permissions can make your website an easy target for hackers. Experts recommend a permissions setting of 600 for sensitive files like wp-config.php, as this restricts access to only the owner.
Remember, the goal is to give just enough permissions for the website to function while limiting potential entry points for cyber threats.
If you need a reliable solution for regular backups and site monitoring, consider using WP Umbrella. Regular monitoring ensures your site stays secure and optimized, giving you peace of mind and a safer WordPress experience.