How to Update WordPress Theme
Learn how to update WordPress themes like a pro.
You can’t go wrong with a WordPress theme. It is one of the most important parts of your WordPress site.
It guides how the pages of your site look, how content is displayed and helps your website appear attractive and professional. Therefore, it is imperative that you keep your theme updated and make sure it always works correctly.
Unfortunately, this is sometimes not as simple as it sounds.
You might lose your work if you update a WordPress theme you have customized. You need to decide what code to update and what not to update if your plugins aren’t compatible with the new theme.
When you run a WooCommerce store with a custom theme, you’ll want to make sure that the theme continues to work after the update.
Etc, etc, etc.
This is why i’ve written this step-by-step guide to updating a WordPress theme correctly and safely.
Why Do You Need to Update Your WordPress Theme?
A WordPress site needs to be updated on a regular basis. WordPress itself, plugins, themes, and other components are updated regularly for good reasons. An update that you miss could threaten your site.
In my opinion, you should always keep your website theme updated for four reasons: security, speed, compatibility, and features.
1. Security
Any discovered security flaws or bugs will be fixed through updates. Updating your WordPress plugins or theme will help you maintain the security of your site.
Whenever a new version of a theme is released, WP Umbrella will alert you, so you have no excuse not to update! 🙂
2. Speed And Load Times
An unacceptably long loading delay negatively impacts page views and customer satisfaction. Making your WordPress theme up-to-date can boost your site’s performance, and thus your ranking in Google and the satisfaction of your visitors.
3. Compatibility With WordPress core, Plugins And Third Party Applications
Developers of WordPress themes should test their themes against new versions of the software and make any necessary adjustments to ensure compatibility.
The theme may, however, become incompatible with newer versions of WordPress as time passes if you don’t update it.
The more you delay the update, the most likely your theme might conflict with WordPress itself or plugins.
To update your theme, you should always make sure you’re using the latest version of WordPress first.
4. Features
Last but not least, updating your theme allows you to take advantage of new features that the developer might have added.
Sometimes themes are updated with new features, either because users request them, or because WordPress has introduced new features (poke Gutenberg!) that can be utilized by themes.
Ready to boost your productivity, impress your clients and grow your WordPress agency?
Install WP Umbrella on your websites in a minute and discover a new way to manage multiple WordPress sites.
Get Started for free
The Checklist To Update WordPress Theme
In order to prevent losing any settings or customizations made to your site before updating a WordPress theme, it’s best to prepare everything carefully.
We recommend going over the below checklist before you attempt to update your theme.
1. Backup Your Website
Before updating your site, you should always take a backup. You will be able to replace your broken site from this backup in the event that an update breaks your site.
The easiest way to do that is to use a plugin like WP Umbrella.
2. Check The Theme Changelog
Additionally, it is important to read the Changelog in README.txt. This file provides the list of new features, improvements, and bug fixes in the new version.
This will indicate you if you can skip the update or if the update is likely to break your website (ie: if the plugin requires a new PHP version to work that your serveur is not handling).
3. Test The Theme Locally Or On A Staging Environnement
Performing a local testing of the theme beforehand is crucial. Prior to applying the theme to your live site, you can test the newest version, track bugs, and ensure plugins are working properly.
I personally do not test my theme locally and rather use the staging environnement of Kinsta. Your choice!
Now, let’s get your theme up to date!
How to Update a Theme in WordPress (Two Ways):
1# Updating A Theme Without Customization
Theme updates are automatically displayed under Dashboard -> Appearance page.
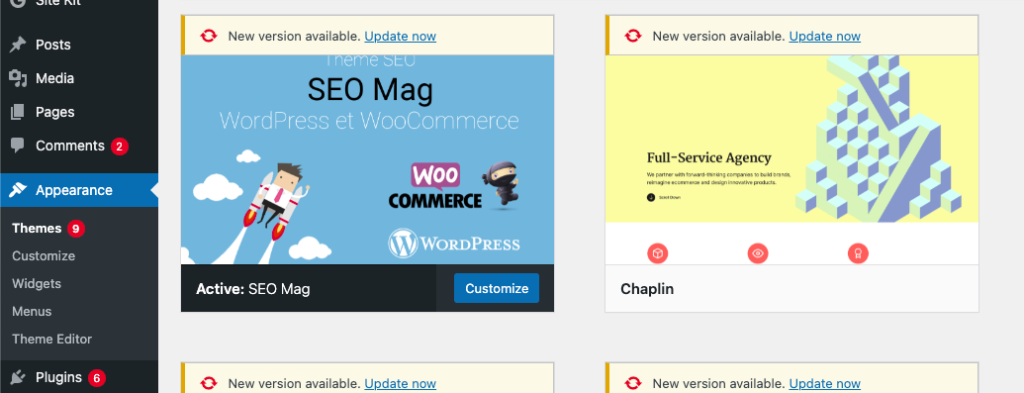
To install the new version, simply click the update button.
WordPress will then download and unzip the theme package, replacing old files with those from the new version.
Warning: It will overwrite all your current theme files. You’ll lose any custom code you manually add to your WordPress theme files.
2# Updating a Custom WordPress Theme
It is possible to customize a WordPress theme in multiple ways. Some of these theme customizations will not be lost in case of update because they are stored in your WordPress database.
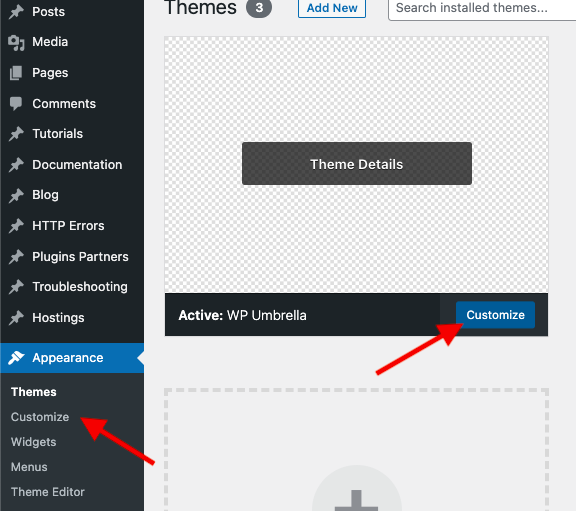
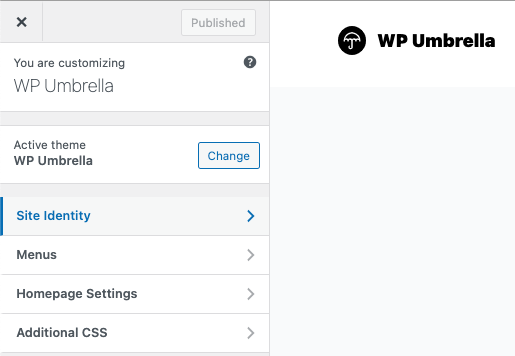
In this category you will find all changes made in the built-in WordPress theme customizer, which can be found at Appearance > Customize.
Modifying your WordPress theme using the theme customizer allows you to save all changes in the WordPress database. It allows you to change the header image, colors, layout, and CSS without loosing anything.
The theme updates should not affect your Navigation Menus or WordPress Widgets either.
In contrast, if you’ve made any changes to the functions.php file of your theme, it will be lost. Similarly, any CSS changes that you have made directly in your theme’s stylesheet will also be erased.
Step 1: Backup Your WordPress Theme
Start by connecting to your website via an FTP client. Then, go to /wp-content/themes/ folder and download your theme folder.
This ways, you will have a backup at hand if the update breaks your website and you will be able to quickly restore it.
Step 2: Save Your Current Theme Customization
The next step is to transfer our existing customizations from the old theme files to the updated one.
The latest version of the theme can be downloaded by visiting the theme editor’s website. Download and unzip it.
By now, you should have both the new and old customized themes.
If you remember what you changed about your theme, simply copy the code samples from the old theme and paste them into the new one.
It will be necessary to search for the changes you made if you cannot remember them. A straightforward way to accomplish this is to compare the theme files.
To do so, you can install WinMerge – a free file comparaison software. By comparing the files side-by-side, you will be able to quickly locate the customizations you have made to the old theme.
From there, you can simply copy/paste the code from your old theme into the new one. Easy peasy!
If you need more information about how to use WinMerge, you can check out this tutorial.
Step 3: Upload The Updated Theme
Now that you have copied your changes over to the new theme, you can upload the updated version to your website.
Now that you have copied your changes over to the new theme, you can upload the updated version to your website.
Connect to your website using the FTP client and browse to /wp-content/themes/. Select the edited theme folder and update it to your website.
This will display a warning that the files already exist with the same name. You need to overwrite your old theme files in order for your new theme to take effect.
Safe Update On WordPress: Final Thoughts
By now, you know why it’s vital for your WordPress theme to always be updated as well as how to update it according to your level of customization.
Please keep in mind that updated themes are more secure, compatible with WordPress core, and take advantage of any newly added features.
In any case, your theme must be updated properly. Whenever you run an update, always take a backup, read the the team changelog and test your changes locally or on a staging environment first.
Thanks for reading this article about updating your WordPress theme.