The Complete Guide To WordPress Image Sizes

Image size and quality are critical for the look and performance of your WordPress website – the two things that will determine if your business is successful.
WordPress image sizes can be quite complicated. The easiest way to optimize your WordPress site is to understand how image sizes work, what the default image sizes are, and how to define custom image sizes.
Throughout this post, I’ll explain how and why WordPress creates different image sizes. Then I’ll explain how you can add your own image sizes by modifying the functions.php file, generating thumbnails, and adding your new image sizes to Gutenberg’s image block and/or WordPress.
Ready to learn everything you need to know about WordPress image sizes?
Let’s go!
WordPress Image Sizes Explained
WordPress automatically creates these additional image sizes when you upload an image to the media library:
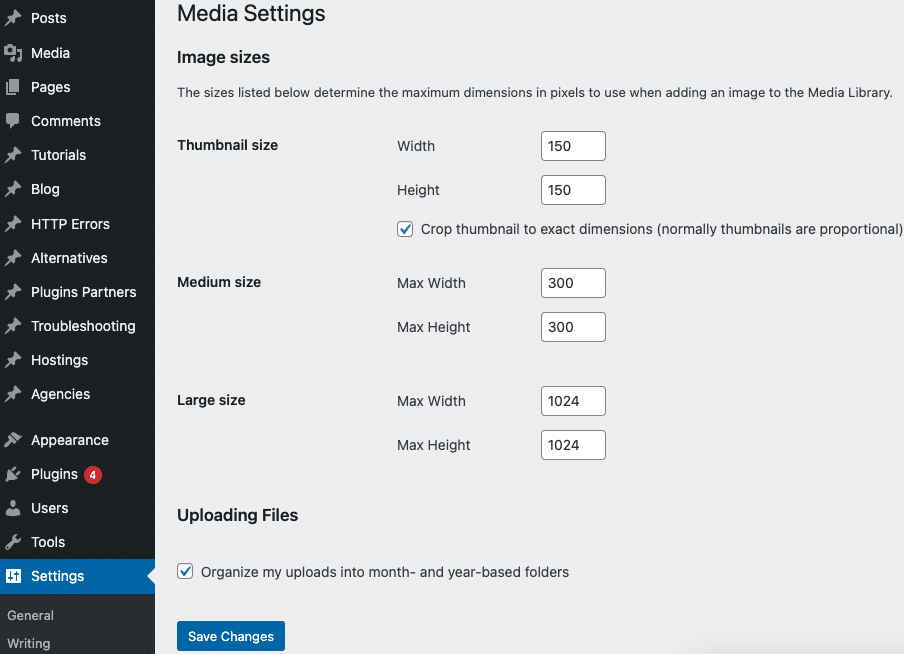
- Thumbnail (150px)
- Medium (300px)
- Medium Large (768px)
- Large (1024px)
WordPress creates additional image sizes if your theme specifies them. Additionally, it saves the original size of the upload and calls it Full as in full size.
That’s a lot of images, right?
Ready to boost your productivity, impress your clients and grow your WordPress agency?
Install WP Umbrella on your websites in a minute and discover a new way to manage multiple WordPress sites.
Get Started for free
Why Does WordPress Generate So Many Images?
All of these different sizes are created by WordPress to serve your images in the most appropriate size for each visitor. The images on your website will always display correctly, no matter what device users are using, speeding up their experience.
The images could always be edited manually to provide these additional sizes, but doing so accurately in a program like Photoshop is no easy feat. WordPress will save you the hassle of having to do all that tedious work.
Where and How WordPress Stores Your Images?
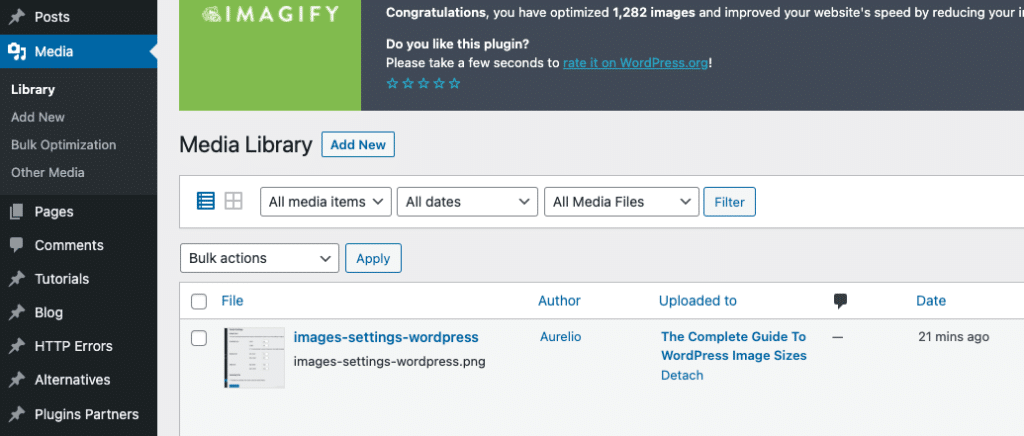
Your uploaded images are stored in the Media Library in your WordPress Admin panel. Click on the Media option and select Library to view all your uploaded images.
There is a way to sort them by media type and date (image, video, audio, etc.).

On the right, you’ll find a search box that will help you find the image you uploaded. To find your image, type the word you used in the title, caption, or description.
By default, the images on your site are stored in the uploads folders (wp-content/uploads/).
Moreover, you can create custom folders for your media files. However, we recommend that only experienced users do this.
What Is The Best Size For WordPress Featured Images?
The featured images in WordPress are critical to reader engagement. Featured images offer a preview of the content that follows, just as the cover of a book does.
The most common way to see them is with WordPress posts, but they can also appear on pages and custom post types. It’s crucial to pick the right size for the featured image because it may appear on search engines and social media.
There is some disagreement on the matter, but generally speaking, a featured image for WordPress should be around 1200 x 630 pixels. Images with these dimensions should always fit your site, no matter how big or small your reader’s screen is.
Lastly, if you want your pages to be eligible for the Google Discover feed your featured image must be at least 1,200 pixels wide.
What is the default size for featured images in WordPress?
Despite what you may expect, WordPress does not actually include a featured image size setting out of the box.
However, featured images will be automatically sized to their original upload size unless otherwise constrained by the design of your site or unless you select one of WordPress’ other default sizes (such as “Large” or “Medium”).
What Is The Optimal Image Size For WordPress Headers?
Header images can reveal the theme and mood of your page just like featured images do. While they are less likely to be shared on search engine results pages or social media feeds, ensuring they are the right size is still vital for the speed of your website.
Due to the fact that header images are often determined by the site’s theme, they can vary greatly in size. Therefore, theme developers recommend that WordPress header images adhere to a 16:9 aspect ratio, such as:
- 1920 × 1080 pixels
- 1280 × 720 pixels
- 1152 × 648 pixels
The WordPress header image doesn’t have a default size like featured images. The theme’s settings may allow you to change the header size, under the Appearance menu of
You can still alter the WordPress header image size if your theme does not allow you to do so. We’ll cover how next.
Changing WordPress Default Image Sizes
In addition to the default image sizes, WordPress allows you to upload your custom image sizes.
The process is quite simple:
- Log in to your WordPress dashboard
- Click on Settings >> Media
- Customize the default image settings
- Save Changes

How to Add Custom Image Sizes in WordPress?
In order to add image sizes, we will add the following code to our functions PHP file:
add_image_size( 'custom-image-size-name', 600, 400, true );There are 4 parameters that this function accepts in the following order:
- Your custom image size’s name
- The image width in pixels
- The image height in pixels
- Do you need to crop the image to fit the dimensions you specified above?
The cropping parameter requires a bit of explanation.
This is a boolean parameter, so either true or false will work. When you don’t specify it, false will be assumed.
Suppose you set your custom image size to 400px * 400px square. Then if you upload a 400px by 800px rectangular image, 400px will be cropped off to make the image square.
It is helpful to set the cropping parameter to true when you need an image size that fits a certain dimension exactly, such as a featured image on a blog post.
How To Update Old Thumbnails
It feels great to create and add custom image sizes. However, you then have to deal with the old images you already uploaded.
You need to regenerate thumbnails.
A thumbnail is an additional image that WordPress creates, including those created via your functions file and the ones in your theme.
Making changes to the way WordPress creates additional images will only affect the images you upload going forward. The images already in your media library will not be affected.
Regenerate Thumbnails with a plugin
You’ll need to use the Regenerate Thumbnails plugin to change the images you’ve already uploaded.

Step 1: Download and activate Force Regenerate Thumbnails plugin
Activate the Force Regenerate Thumbnails plugin to make WordPress regenerate thumbnails.
After that, go to your WordPress admin > Tools > Force Regenerate Thumbnails.
Step 2: Resize old images
Click the Regenerate All Thumbnails button to force WordPress to regenerate all images sized with the old settings.
For smaller sites, this won’t take long at all, but for larger sites with tons of images, it could take a while.
Regenerating thumbnails without a plugin
Note that you can also resize your thumbnails directly from the WordPress library. Go to Media > Library, and in the grid view, click on the image you wish to update.
Then on the right, click the Regenerate Thumbnails button.
And that’s it!
Wrap up
Although WordPress image sizes seem trivial, they can be a major headache. In some cases, the image that you upload does not meet the desired image size.
There are two ways to fix this issue. You can either change the default WordPress image size or add custom image sizes. After that, do not forget to regenerate your thumbnails.
When setting the new image size, remember that uploading large images may not be the best idea.
Images that are large will take up a lot of space and slow your site down.
